A focus on how to pierce your ear, cartilage, painlessly, without hurting, at home, with a sewing needle, earring, a gun and a safety pin.
How to Pierce your Ear at Home
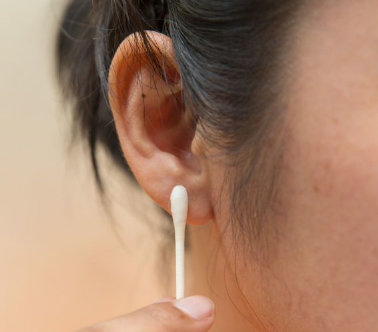
How to pierce your ear
While the outcome of piercing the ears is very much glamorous, actually, the piercing of the ears can be a bit risky. But, if you are like it and you want to pierce them (either because you require to impersonate a person, or because you like the looks) follow the indicated steps so as to bedazzle the ears in a safe way.
How to Pierce your Ear Cartilage
- Recognize that home piercing is very hard to do as required. It’s much safer and sanitary to make use of a professional. Piercing the ears at home leads to a higher chance of an infection. Also think about the choice very much carefully before you perform it.
If you do decide to pierce the ear at home, then you should carefully follow the steps.
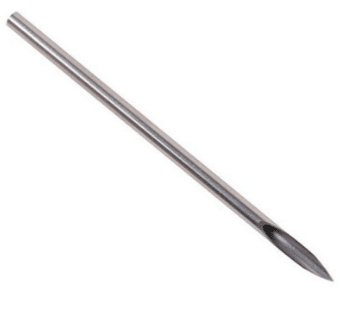
2. Get a sterile piercing needle. Piercing needles normally have a hollow center so that a person can easily slip an earring through the ear when you make a hole using the needle. Do not in any way try to share the needles with any other person as this may cause an infection.
Piercing needles are able to be cheaply obtained at most of the online vendors and also at most of the piercing studios.
- Make sure that you use a needle that is one gauge bigger than the earring that you intend to put on. For instance, a 15 gauge barbell studs should be combined with 14 gauge needles so as work well.
- You can also obtain a piercing package, which normally comes together with two sterilized piercing earrings that have already been loaded into something that looks like a spring puncher. You can obtain all these at the nearest beauty supply stores. Make sure that you follow the directions that are on the package exactly as they are indicated.
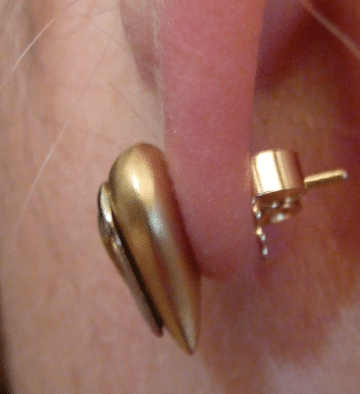
3. Pick out your piercing earrings. The best thing for the newly pierced ears, whether it is through lobes or even a cartilage, are the studs. 15 gauge and 10mm long is a perfect size; the length also allows for the swelling, which might easily double the thickness of the ear.
- Some of the jewelry stores normally sell piercing earrings as they are earrings that have a very sharp tip which is similar to the needle. These are very good to use as they will re-pierce the ear as you slide them into the hole that is made by the needle.
- If you can, obtain earrings that are of a higher quality metal like those of silver or titanium. Metals of higher quality are not likely to infect an ear or even lead to an allergic reaction. Be aware that some other people are more allergic to the lower quality metals such as the gold-plated metal.
4. Sterilize the needle using an open flame. Do not reuse needles that have been used; the needle is supposed to come in a good sterile package. Hold it in such a position until the tip is red hot. You should also wear a sterile latex gloves in the process so as to make sure that bacteria that may be on the hands does not infect on the needle.
Be sure to get rid of any soot or even detritus. Wipe the needle very much clean using 15% rubbing hydrogen peroxide. Be forewarned that the process will only be partial sterilization and cannot be able to get rid of all the potential microbes that might be found on the needle.
The only way to fully sterilize the piercing utensils is by use of an autoclave.
-
- You can also sterilize the piercing needle by use of the boiling water. Once the water has boiled, place it in the boiling water and let it stay there for a period of about of about 10 minutes. Get rid of it by use of the tongs and only hold it by use of the sterile latex gloves. Wipe it down by use of hydrogen peroxide or even the rubbing alcohol.
- Wash hands using soap and water. This is able to decrease any given chance of the bacteria of spreading. Put on the sterile latex gloves after you have washed hands.
- Keep hair away from the spot that you are planning piercing. The hair is able to get stuck in between the ear and also the earring, or it might be pushed through the hole that you are making using the needle. If possible, tie the hair up and further away from an ear.
- Use the pre-packaged 70% isopropyl alcohol swabs so as to clean an ear. You must do the process because the ear is fully wiped clean of bacteria that might have gotten into the piercing. Wait until the time when the ear is dry to pierce it.
- You can also make use of the hydrogen peroxide or even by rubbing alcohol so as to sterilize your ear.
- Make a small mark at the points where you want the piercing to go. It is very vital to plan much ahead for where you would like the piercing to go; otherwise your piercing might end up crooked, too high, or too low. If you are piercing both of ears, observe in the mirror to make sure that the indicated marks on the ears are even.
- If you have any other piercings and are doing the second piercing, then make sure that you leave a lot of space in between the piercings so that you wear the studs in both holes without the earrings seeming to be overlapping. Likewise, don’t make the holes very far apart or they might appear very odd.
How to Pierce your Ear with a Sewing Needle
-
Ear piercing using sewing needle
Sterilize piercing tools. If the needle doesn’t come in the sterile packaging, or you’re using a needle, you will require to sterilize the tools thoroughly before any use. Take a match or even a lighter and hold the piercing end over the open flame for a period of about 10 seconds.
Allow the needle to cool a bit, then wipe it down using the rubbing alcohol or even the hydrogen peroxide. Leave it on a tissue so as to dry and also to make sure not to touch the piercing end after the point.
-
- You will also require to sterilize the earrings through submerging of the earings in the hydrogen peroxide if they do not come in the sterilized packaging. Let them be in the sterilization fluid for a period of about 1 minute, before doing away and setting on a clean piece of tissue so as to dry.
- Make sure to separate the front and backs of the earrings. This will make them easier to insert when the time comes.
- Understand that this particular method will not be in a position to fully sterilize the earrings, there will still be some amount of the bacteria that is left. The only method to guarantee full sterilization is to obtain the products that are pre-sterilized, or use an autoclave.
- Clean the ear. The next thing that you require to do is clean the ear so as to get rid of any bacteria from the skin. You can do this method by dipping a cotton ball deep into the rubbing hydrogen peroxide and applying it so as to wipe the front as well as the back of the earlobe. Allow it to dry fully before continuing with the process.
- It is also very much possible to obtain antibacterial gel (like the Bactine) which is designed for use with the piercings. This is found at most tattoo and also the piercing parlors, or even online.
- Mark the skin area where you want the piercing to go. If you like, you may make use of a felt tip marker so as to indicate the skin area where you want to pierce. This will assist to center the needle on the earlobe and also prevent any crooked piercing.
But some other people mostly prefer to avoid marking of the spot, as they don’t like getting ink in the fresh piercing. Whether you mark the area or not is up to an individual and a matter of personal preference.
- Numb the ear (equally optional). At this particular point, certain people also choose to numb the ear. This may be performed by holding of an ice cube or even an ice pack against the ear for a minute before the piercing.
This can effectively be able to numb the ear, but the cold can also lead to the skin which is on the ear to tighten, thus making it much tougher and harder to pierce. For this particular reason, most of the people choose to skip this particular step.
-
- However, you can also rub a numbing gel onto the earlobe by use of a q-tip. Wait for it to dry before proceeding with the process.
- Wash hands. Before going further, make sure that you wash hands thoroughly using anti-bacterial soap. After sterilizing the tools of work, earrings as well as the ears carefully, you don’t want dirty hands. If you like, you can also wear latex gloves when you pierce, though this is able to feel a bit awkward.
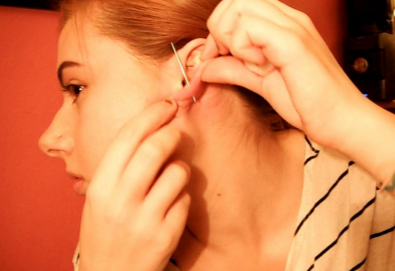
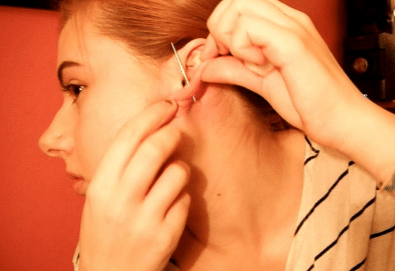
- Place cork against the back of the earlobe. Hold it strongly in place using one hand, while you pick up the needle using the other. But, have another person to assist you out by holding the cork in place while you piercing.
- Position of the needle. Pick up the needle (or safety pin) and then position it against the ear, centered at a 90 degree angle from the earlobe. If you spot is marked, then place it directly above the dot.
- Pierce the ear. In a smooth, fluid movement, you should push the needle to go through the earlobe and also into the cork that is on the other side. You can feel a very sharp pinch, and the ear might feel hot and very much flushed, but will not be much painful. Hold the needle in the ear for about 45 seconds and then wiggle it around slightly. This can assist to widen the hole.
- Insert the earring. If you have made use of a piercing needle, inserting of the earring will be much easy. Simply slide the pin into the center of the needle, pull the needle to come out, leaving the earring in the ear. Wipe away any blood that is available using a cotton ball, then secure the back.
- If you have made use of a safety pin or even a regular needle, then you will require to work much more quickly, as it can be very much difficult to get the earring to go through a fresh piercing.
- Get rid of the needle from the ear and, hold the earlobe slightly taut, push the pin to go through the hole as fast as you are able to.
- Repeat the procedure with the other ear. If you are piercing both of the ears, go through the whole procedure again and repeat on the other side.
How to Pierce your Ear with an Earing
-
Piercing an ear using earing
Fill a small shot glass with alcohol. Try to get the strongest alcohol that you are able to find
- Put the earrings that you wish to have in after you piercing the ears into the alcohol.
- Take a small container and put the sharp earing in the alcohol also to soak. This will be able to sterilize it.
- Take one smaller container and put Hydrogen Peroxide in it. Rub the ear before stabbing it using a needle this will get rid of the bacteria and also the germs on the ear.
- Dot the ear so that you understand where you want it to be pierced. Make sure that it is even.
- Take a sharp earing and then dry it off a bit. As you start to push through the ear you will be able to hear some popping sounds. That implies that it is going through.
- After the needle is in the skin, you may want to dry off earrings. Then take out the needle and put the earring in very fast.
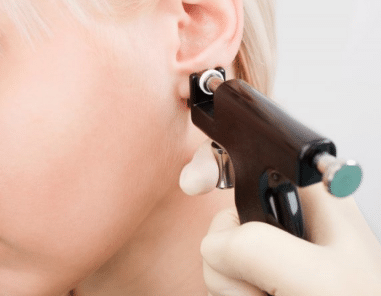
How to Pierce your Ear with a Gun
The piercing gun is a specialized tool that is designed specifically for use on the ear lobes, or even the navel. A stud gun as is widely known should only be made use on the body part for which it is specifically designed.
There are several types of piercing guns, the front part of the gun holds a stud earring and the back is used to hold the clasp, normally a butterfly clip. The piercer places the earlobe into a slot that is between the two areas and then pulls the trigger, thus pushing the shaft of the earring through the ear and into the clasp.
- The gun method is very much quick and easy to apply and needs less training of the piercer. A hand-powered gun usually drives the piercing stud into the ear. Other places make use of two guns simultaneously.
- The plastic bodies of the guns can’t be totally sterilized between the uses, so they normally use a sterile, which is sealed disposable cartridge that normally inserts encapsulated sterile studs.
How to Pierce your Ear a Safety Pin
- Disinfect the safety pin by boiling of water for about 10 minutes. Remember that whenever you put the pin down, you will contaminate it, so is the fingers, so be very much careful.
- Numb the ear that you wish to pierce using ice cubes. This can be the most painful part of the process. Hold the ice to the ear for the period that you can stand, about 3-5 minutes.
- Fold the towel a few times, then brace the part of the ear that you are piercing using this so that you won’t be able to stab yourself.
- Pat the ear and the pin down with the disinfectant or even salted water.
- Push the safety pin through the ear and very close. The hardest thing is keeping the pin to be straight so that you get a very straight hole. It’s very easy to end up with a piercing that is at an angle – so be much careful. If you are piercing the upper ear or even through the cartilage, be very prepared for a crunching sound as you break through.
- Dab again using the disinfectant or even salted water. Remember not to double dip if using a container.
- Leave to heal for at least one week, treating it as you would any new given piercing. Leave it alone, only twisting it about two times a day and also disinfecting it. Don’t touch it with the fingers all the time.
How to Pierce your Ear Painlessly, without Hurting
-
How to pierce your ear painlessly
Get all of the materials to be ready
And just as with any other person, you want to do the procedure as painlessly as possible. Ice packs cannot be able to assist with the pain before the piercing. What this does is to add the texture and also the abrasions to the skin thus making the piercing to be harder. There will be a tough exterior and on the inside part be an extra fatty tissue that will require to be punctured. Ice will not assist with the pain.
- Never share a needle with another person
Regardless of how good is a friend, or whether you’re in any way related or not, don’t under any given circumstances ever share a needle with any other person. This is something that is able to be avoided with the common sense.
You may want to clean the needle using the disinfectant and make use of a hot flame so as to burn the tips or any other surface that can be puncturing the skin.
- Wash hands
Once the needle is very much ready, it is advised for you to wash hands and then sterilize them to the best of the ability, and also the earrings that you will be placing in the ears after the needle has pierced through the skin. Any foam or even a spray disinfectant that may be used to the earlobe would be advised as well.
- Place potato behind the earlobe
Take the potato and place it behind the earlobe. This is a safer method that can be used to protect the neck and assist with the force that is from the piercing. If you have someone who is available to assist you, they can be able to pierce while you hold the potato. You may want something that appears solid but easy to hold.
- Slowly slide the piercing needle
Slowly slide the piercing needle very much smoothly through the earlobe until it is through. Wiggle the needle, taking it at an angle, and once it is through, then take a large ice cube and hold it for roughly 10 minutes. This will assist with the pain at the point as well. Then, thread the earring into the whole while removing piercing needle out.
- Take care of your newly pierced ears correctly
Once you get your ears pierced, it’s important to care for them in a good way. Don’t touch the newly pierced ears during the day and be very much careful with the clothing that you wear, especially try to avoid wearing of anything that has hoods.
It will be much wise to just leave the earrings in for about 5 weeks, turning them daily and also cleaning them for about 3 times a day using an astringent or any other available disinfectant so as to avoid infection.
When taking swimming, consider wearing a swimming cap so as to cover the pierced ears and also protect them from any water, shampoo and also a conditioner. If you see any kind of irritation or even if you have an earache, see the doctor urgently.